Kieker Coding Conventions in Eclipse
- Andre van Hoorn
Setup Eclipse to conform to the Kieker Coding Conventions
The Kieker Coding Conventions are a derivate of the Eclipse Coding Conventions (ECC) which are by themselves a derivate of the Java Coding Conventions (JCC) for Java.
We define two deviations from the ECC which are:
- We allow 165 characters per line instead of only 80 characters. As modern screens are way bigger than those decades ago, the limitation to 80 characters in conjunction with human-readable method names result in ugly line-wrappings. To reduce this problem we double the line length.
- All parameters of methods are declared final as long they are not modified internally in the method.
To setup these changes in Eclipse we provide the following tutorial.
Preliminary Informations
This tutorial is for Eclipse Indigo. Therefor the setup may differ in other versions of Eclipse. As we know that people might have different coding conventions in different projects, this tutorial instructs how to setup the formatter and the editor in a project specific manner. If you want these coding styles to be present in all projects you have to deviate from the given instructions or reproduce the setup for every project.
Now, start Eclipse. Select a project in the Package- Explorer. Right-click on it and select the Properties option, which is the last entry in the context menu. It opens the properties dialog for the project.
Setup the Clean Up
- Unfold the Java Code Style option and then Clean Up. This will open the clean up form in the dialog.
- Check the Enable project specific settings. This enables all the dialog options below.
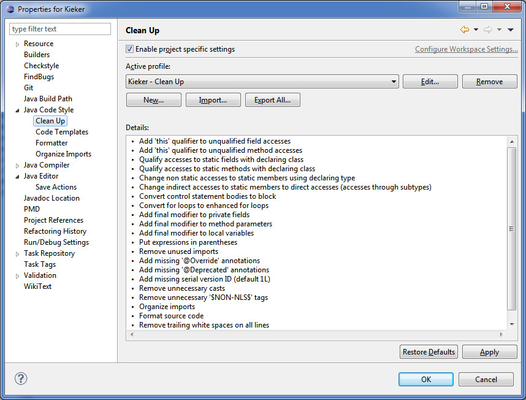
- Now click on the Import...-button under Active - Profile. This brings up a file dialog.
- Select in the file dialog the kieker-eclipse-cleanup.xml. It can be found on git at /kieker-eclipse-cleanup.xml
- Ensure that the Kieker - Profile is displayed as active entry in the selector below.
- Finally click on Apply to apply the clean up settings.
- If you are not interested in setting up further settings right now, press the Ok-button.
Setup the Formatter
- Unfold the Java Code Style option and then Formatter. This will open the formatter form in the dialog.
- Check the Enable project specific settings. This enables all the dialog options below.
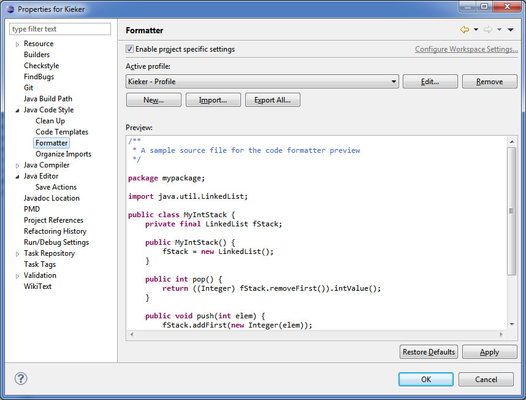
- Now click on the Import...-button under Active - Profile. This brings up a file dialog.
- Select in the file dialog the kieker-eclipse-formatter.xml. It can be found on git at /kieker-eclipse-formatter.xml
- Ensure that the Kieker - Profile is displayed as active entry in the selector below.
- Finally click on Apply to apply the formatter settings.
- If you are not interested in setting up further settings right now, press the Ok-button.
Setup the Organize Imports
- Unfold the Java Code Style option and then Organize Imports. This will open the organize imports form in the dialog.
- Check the Enable project specific settings. This enables all the dialog options below.
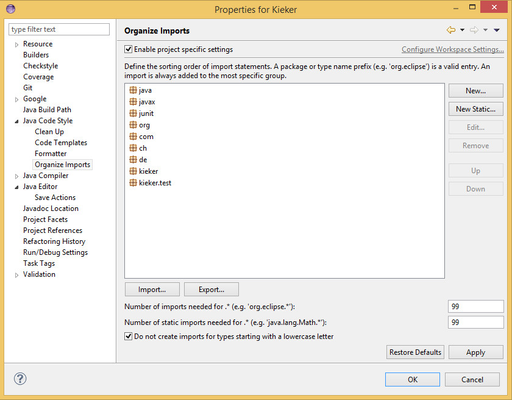
- Now click on the Import...-button. This brings up a file dialog.
- Select in the file dialog the kieker-eclipse.importorder. It can be found on git at /kieker-eclipse.importorder
- Ensure that the import order is as displayed in the picture.
- Finally click on Apply to apply the formatter setting.
- If you are not interested in setting up further settings right now, press the Ok-button.
Setup the Save Actions
Save actions are applied to the content while saving the file. the are setup in the project properties dialog. If you previously closed that dialog, reopen it by selecting the project in the Package Explorer. Right-click on it and select the Properties option, which is the last entry in the context menu. It opens the properties dialog for the project.
- Unfold the Java Editor option and select Save Actions.
- Check the Enable project specific settings. This enables all the dialog options below.

- Select the options as displayed in the picture.
- Now click on the Configure...-button right of the list of additional actions. This brings up the save action configuration.

- Select the tab Code Organizing
- Select the options as displayed in the picture.
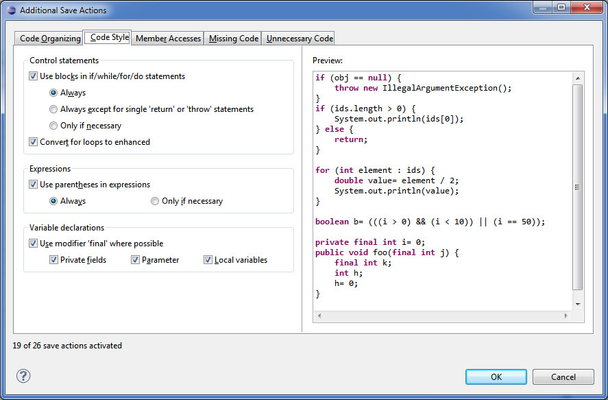
- Select the tab Code Style
- Select the options as displayed in the picture.
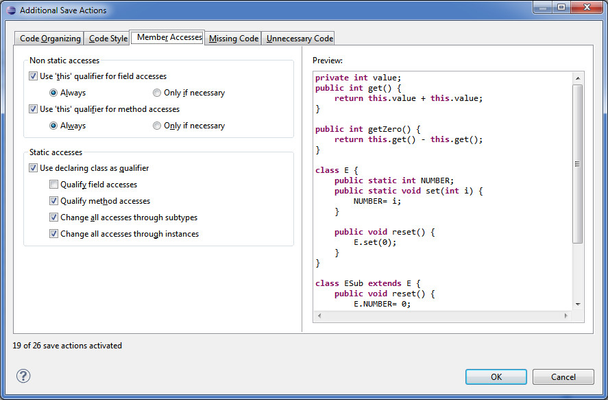
- Select the tab Member Accesss
- Select the options as displayed in the picture.
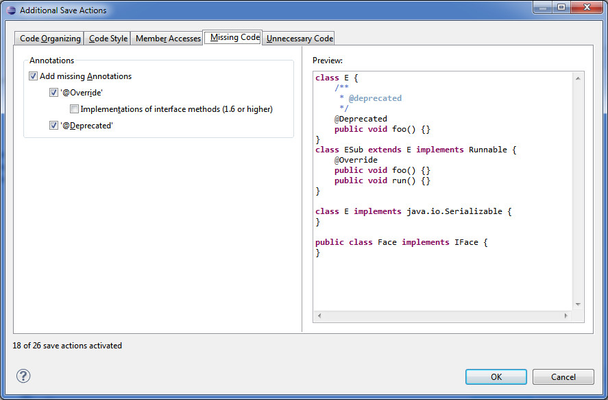
- Select the tab Missing Code
- Select the options as displayed in the picture.

- Select the tab Unnecessary Code
- Select the options as displayed in the picture.
- Now click on Ok to accept the setup.
- In the Save Actions tab, press Apply to apply these settings.
- If you are not interested in setting up further settings right now, press the Ok-button.